
There are many hikes in Yosemite that you can enjoy. Half Dome (El Cap) and Half Dome are the most popular. But there are many more. These trails are not easy, but they can be very rewarding. Depending on your skill level, you can take as long as you want. Try one of the shorter Yosemite trails if time is tight.
Try the Four Mile Trail for a challenging hike. The Four Mile Trail climbs 3,200ft to Glacier Point, starting at the bottom of Sentinel Rock. Although it is only five miles long, the old toll railway path still affords stunning views of Yosemite Falls as well as the valley below. A side trip to Union Point is possible, which offers a spectacular view of the valley below.
The Valley Trail starts on the valley floor and is one the most popular in Yosemite. It climbs up to a viewpoint at an elevated vantage point, climbing over 1,000 feet. These views include El Capitan, Half Dome, and many others. You will be able to enjoy the park's scenic beauty and many hiking trails in Yosemite.
The Cathedral Lakes Hike, a fantastic choice for a day at Yosemite National Park, is a great option. The hike is easy and takes between three and five hours. You'll find it winding through marshy, mossy areas. The trail ends with a picnic at Cathedral Lake. Enjoy the view and rest after the hike. If you have more energy and the time to climb, you can go on a different trail.
The park offers many scenic trails, so whether you are looking for a Yosemite hiking trail or a day hike, there is something for everyone. There are many options to choose from. You're sure to find one that suits you. When it comes to hiking, make sure to do as much as possible, and you'll soon realize the incredible beauty of the park. You won't regret!
Mount Hoffman Hike. Half Dome's trail begins only after the snow has melted. You will have spectacular views of Yosemite Valley as well as the high Sierras from this trail. The hike takes six to ten hours. It is also a good option if you're short on time. Yosemite has many other wonderful hikes that will leave you amazed and breathless.
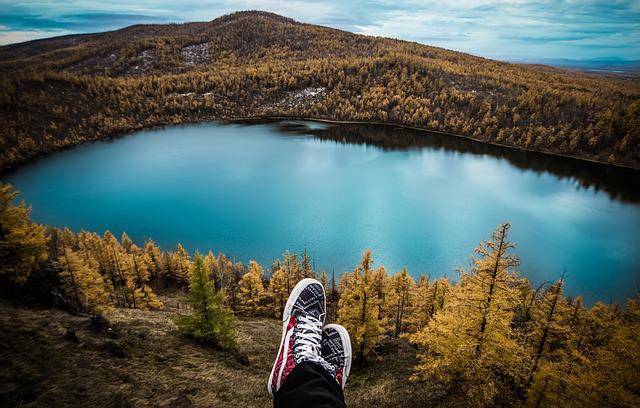
Sentinel Dome. This hike is 2.2 mi roundtrip and will give you jaw-dropping views over Yosemite Valley. It is also shorter than the majority of Yosemite's routes, and will allow you to spend more time exploring the park. Those who don't want to hike for hours may choose to take a short trail, such as the Mist Trail.
FAQ
What should you buy first when prepping
Make sure you bring enough water for everyone on your trip. They are extremely important!
You also want to make sure you have plenty of sunscreen lotion. It doesn't really matter if your destination is hiking or the beach, you will still need sunscreen lotion.
Make sure to keep extra batteries on hand for any electronic devices. Don't forget to bring some sunglasses. You won't realize how much glare you will experience until you reach the destination.
What are the best things to buy for the end?
You may think it's silly but you need to know what you need to buy if you want survive the apocalypse.
This is a list with essential items that you need to keep in your house when the world stops.
Prepare mentally and physically to face an apocalyptic future.
It is important to be prepared for every eventuality.
Start by building a food and water stockpile.
Think about the other essentials like matches, lighters and batteries.
Finally, make sure you have enough cash to last you until the end of time.
After all, who knows how long we'll have left to live?
How can I get started with survival prep?
Start with an emergency kit. An emergency kit should include food, water shelter, medical supplies, and basic necessities. You can then add items to help you stay secure and safe.
You may also want to add a solar-powered flashlight, radio, compass or whistle as well as a map, compass, whistle, whistle, and compass. Fishing equipment is a good option if you live near streams, rivers, and lakes.
A bug-out bag (BOO), is another way to be prepared for any emergency. This is a backpack with all the essential gear. Some BOOs are equipped with a tent, sleeping bags or firestarter, a stove, pot, cookware, battery, flashlights and first aid kits.
There are lots of options when it comes to preparing for disasters. These are the basics. Expand your list according to your situation.
What should you include in a bugout bag?
The Bug Out Bag (BOB), is a kit that can help you survive for 72 hours without food, water or shelter. This kit contains a first aid kit and a whistle, fire starter. A knife, flashlight, whistle. Matches, rope, matches. Handkerchief. Toilet paper. Hygiene items. Sunscreen, sunscreen, socks, gloves, gloves, emergency blanket. Energy bars, batteries.
Remember that you'll probably only use half the items in your BOB. Make wise choices.
How many days' worth of supplies should you have?
Ideal is to have three months of supplies saved away. This means that you should have enough food, water, or other necessities to last three months.
This number can vary depending on how severe the emergency is. It is possible that you don't have any neighbors in an area where you can get help. Perhaps there isn't a power grid.
In this case, you should be prepared for a longer-term position.
My survival gear should be stored where?
It is best to keep your emergency survival gear near you so it is easily accessible in the event of an emergency. You can store your supplies in a closet, under your bed, or in the basement.
You need to label all supplies with the contents, date, and how they were used so you can easily identify which ones are good and which are not.
Keep a copy of the inventory in another place. In case of an accident to your home or apartment, you will need proof that you have the right stuff.
Statistics
- A survey commissioned by National Geographic found that forty percent of Americans believed that stocking up on supplies or building a bomb shelter was a wiser investment than a 401(k). (newyorker.com)
- In the first ten months of 2016, foreigners bought nearly fourteen hundred square miles of land in New Zealand, more than quadruple what they bought in the same period the previous year, according to the government. (newyorker.com)
- Receiving 11.2 percent of votes in our reader survey was a propane torch. Background: This summer, we surveyed our readers about what they’d shove into a backpack if they were caught unprepared for the collapse of society. (inverse.com)
External Links
How To
How to preserve food in a survival scenario
Drying food is the best way to preserve it in an emergency situation. Drying foods removes moisture which makes them last longer. It also reduces the possibility of bacteria growth.
Because dried fruits don't require much preparation, they are great for snacking in an emergency. Dried fruits are easy to transport and can be eaten as much as you like without worrying about weight gain.
You can make dried fruit at home using a dehydrator, but if you have access to a solar oven, this would be ideal. You can dry any kind of food in a solar oven.
The most important thing when preserving food is to ensure it is airtight. This will prevent oxygen from getting into the container and spoiling food. If you seal the container tightly enough, there won't be any need to add preservatives.
If you do decide to add preservatives, try adding salt first. Salt prevents mold growth. Then, follow that with vinegar. Vinegar kills off harmful bacteria and stops mold from growing.
Start by cutting up your food in small pieces. You can use scissors or a knife. Make sure you pack everything well so that no air gets inside the container.
Place the food in a plastic bag. Place the food inside a plastic bag. Keep it warm until it dries fully.
Once food has dried completely, it can be stored in a sealed container. Make sure that nothing touches the food.